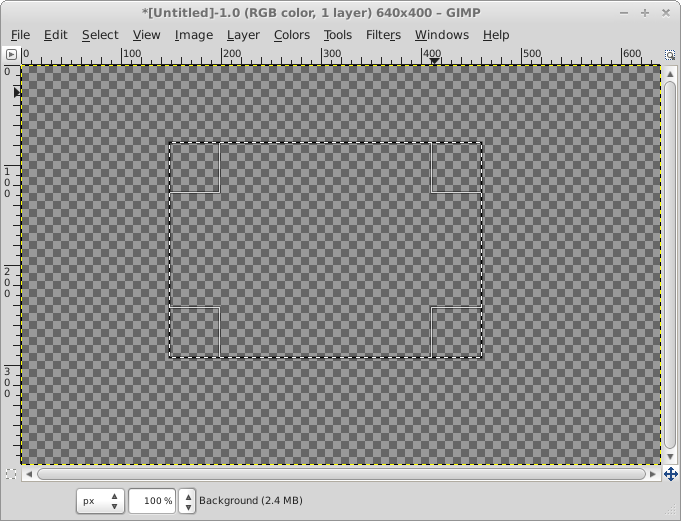
With the Symmetry Tile plug-in the user selects an area using the rectangle select tool, before running the plug-in. The plug-in then derives a cell to use to form the user's choice of symmetry pattern. For many of the symmetries that derived cell is the same as the selected rectangle. Some of the symmetries need a cell shape other than the rectangle. Those cell shapes and their relation to the user's rectangle are shown below, along with the symmetry groups that use that cell shape.

Square - p4, p4g, pg (some)
Equilateral Triangle - p3m1, p6
Half square triangle - p4m
90, 60 and 30 degree triangle - p6m
Diamond - p3
Kite - p31m
In many cases the user may want to create specific content to fill the required cell shape. It would be easier to have this shape on the screen to help you to draw the cell content in the correct place. Here's how to do that. I'll use the kite shaped cell here as an example but this method applies to any of the non-rectangular cells.
- Create a new image with a transparent background.
- Select a rectangle about the size you want your cell to be.
- Run the Symmetry Tile plug-in, choosing a symmetry group that uses the desired cell (p31m for the kite). This will produce a blank transparent image which can be discarded. The plug-in will also leave the correct shaped cell selected in the original image.
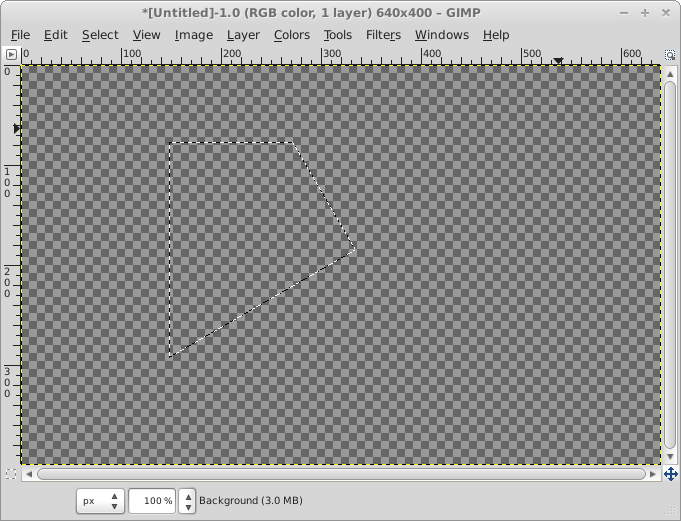
- Convert that selection to a path. (Select> To Path).

- The path can now be used as a guide to the cell shape. Use it to draw the cell content in the correct place, filling the cell area with brush strokes etc.
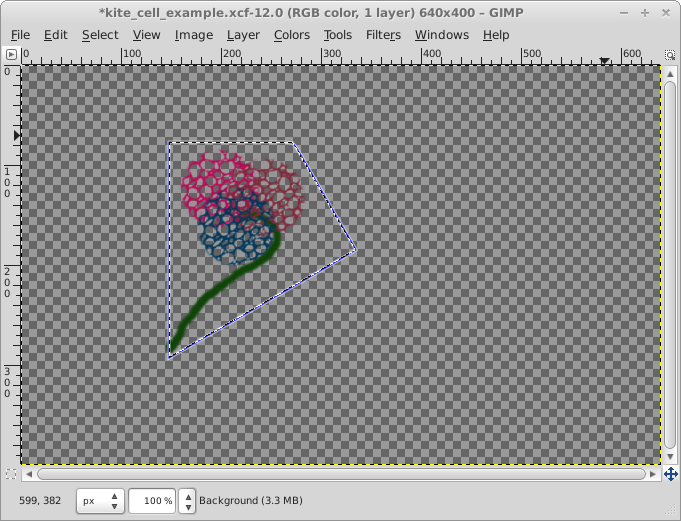
- Select the path, convert it back to a selection and re run the plug-in.
Credit for this method is due to lylejk who posted it over on gimpchat.